spring boot+vue管理系统
一个仓库管理系统,后端实现只有简单的增删查改,主要是前端Vue2页面搭建 + 前后端通信 + 路由。前端页面布局可以照抄element-ui,没什么技术含量,纯属细心。属于是非常入门级别spring boot + Vue了。
文档
1、Vue Router:https://v3.router.vuejs.org/zh/guide/
2、Vuex:https://v3.vuex.vuejs.org/zh/
3、element-ui:https://element.eleme.cn/#/zh-CN/
4、Mybatis-plus: https://baomidou.com/
后端项目
常用注解
@Controller页面与数据
@ResrController 数据
前后端分离项目一般只用RestController,默认情况会将后端返回的对象数据转换为json格式
@RequestBody 将http请求得内容绑定到到方法的参数上(一般是封装为Json格式)
@Autowired 自动导入对象到类中,被spring 容器管理
@Configuration 声明配置类
@PathVariable用于获取路径参数
@RequestParam用于获取查询参数。
参数传递
访问链接有参数(与变量名一致)
//    /hello?nickname=promefire&phone=12345
    @GetMapping("/hello")
    public String hello(String nickname,String phone){
        return "hello " + nickname + phone;
}访问链接有参数(与变量名不一致)
使用@RequestParam("nickname")注解
//    /hello?nickname=promefire&phone=12345
    @RequestMapping(value = "/hello",method = RequestMethod.GET)
    public String hello(@RequestParam("nickname") String name, String phone){
        return "hello " + name + phone;
    }
访问静态资源
- 在
resources下新建static文件夹,导入图片2.png,直接访问localhost:8090/2.png即可,
定义过滤规则表示访问时路径需要加上/images即访问localhost:8090/images/2.png
spring.mvc.static-path-pattern=/images/**默认静态资源目录为classpath:/static/,自定义静态目录
spring.web.resources.static-locations=classpath:/static/classpath表示类路径,java文件编译后会放在类路径下,即target目录下的classes
文件上传
默认设置限制了上传文件的大小,更改设置在配置文件加入如下两行
#单个文件大小
spring.servlet.multipart.max-file-size=10MB
#每次请求所有文件大小
spring.servlet.multipart.max-request-size=10MB
用户上传的图片也属于静态文件,也要遵循上面的过滤规则,前加/images
拦截器
配置类
@Configuration
public class WebConfig implements WebMvcConfigurer {

    @Override
    public void addInterceptors(InterceptorRegistry registry) {
//        创建一个自定义的拦截器,增加拦截的的路径
        registry.addInterceptor(new LogonInterceptor()).addPathPatterns("/user/**");
    }
}
多表查询
@Select("select * from user")
   @Results(

           {
                   @Result(column = "id", property = "id"),
                   @Result(column = "no", property = "no"),
                   @Result(column = "name", property = "name"),
                   @Result(column = "password", property = "password"),
                   @Result(column = "age", property = "age"),
                   @Result(column = "sex", property = "sex"),
                   @Result(column = "phone", property = "phone"),
                   @Result(column = "role_id", property = "roleId"),
                   @Result(column = "isValid", property = "isvalid"),
                   @Result(column = "id", property = "records", javaType = List.class,
                           many = @Many(select = "com.warehouse.mapper.RecordMapper.selectByUid"))
           }
   )
List<User> selectUserAndRecord();- 实体类User新增变量records后,要加上getter和setter方法,要不然结果会不显示
- @Result中column表示查到的表中的字段,property表示实体类中的字段。此处表示映射关系,所有的映射都要写
@Result(column = "id", property = "records", javaType = List.class, many = @Many(select = "com.warehouse.mapper.RecordMapper.selectByUid"))需用javaType指明records类型为集合List,使用many@many(select = )因为一个用户有多个订单。订单查用户则用one@one(select = )
条件查询
使用QueryWrapper在Service层使用 https://baomidou.com/pages/10c804/
public List<User> selectList() {
        QueryWrapper<User> queryWrapper = new QueryWrapper<>();
        queryWrapper.ge("age",20);
        return userMapper.selectList(queryWrapper);
    }
分页查询
配置类-一个分页拦截器
@Configuration
public class MybatisPlusConfig {

    @Bean
    public MybatisPlusInterceptor mybatisPlusInterceptor() {
        MybatisPlusInterceptor interceptor = new MybatisPlusInterceptor();
        interceptor.addInnerInterceptor(new PaginationInnerInterceptor(DbType.MYSQL));
        return interceptor;
    }
}
查询
    @GetMapping("/user/findByPage")
    public IPage findByPage(){
//        User:查询的是那张表,   0:起始值 从第几条开始取     2:每页条数  取几条
        Page<User> page = new Page<User>(0,2);
        IPage iPage = userMapper.selectPage(page,null);
        return iPage;

}- 更简单的方法使用
PageHepler
代码生成器
根据数据库中表来生成controller、mapper、service、entity层代码,虽然只是新建了类,省去手动的麻烦,
需要注意的时生成后要在service实现类和mapper类顶端加入@Service @Mapper注解
package com.warehouse.common;

import com.baomidou.mybatisplus.core.exceptions.MybatisPlusException;
import com.baomidou.mybatisplus.core.toolkit.StringPool;
import com.baomidou.mybatisplus.core.toolkit.StringUtils;
import com.baomidou.mybatisplus.generator.AutoGenerator;
import com.baomidou.mybatisplus.generator.InjectionConfig;
import com.baomidou.mybatisplus.generator.config.*;
import com.baomidou.mybatisplus.generator.config.po.TableInfo;
import com.baomidou.mybatisplus.generator.config.rules.NamingStrategy;
import com.baomidou.mybatisplus.generator.engine.FreemarkerTemplateEngine;

import java.util.ArrayList;
import java.util.List;
import java.util.Scanner;

public class CodeGenerator {
    /**
     * <p>
     * 读取控制台内容
     * </p>
     */
    public static String scanner(String tip) {
        Scanner scanner = new Scanner(System.in);
        StringBuilder help = new StringBuilder();
        help.append("请输入" + tip + ":");
        System.out.println(help.toString());
        if (scanner.hasNext()) {
            String ipt = scanner.next();
            if (StringUtils.isNotBlank(ipt)) {
                return ipt;
            }
        }
        throw new MybatisPlusException("请输入正确的" + tip + "!");
    }

    /**
     * 操作步骤:
     *  1.修改数据源包括地址密码信息,对应代码标记:一、 下同
     *  2.模块配置,可以修改包名
     *  3.修改模板(这步可忽略)
     * @param args
     */
    public static void main(String[] args) {
        // 代码生成器
        AutoGenerator mpg = new AutoGenerator();

        // 全局配置
        GlobalConfig gc = new GlobalConfig();
        String projectPath = System.getProperty("user.dir")+"/warehouse";
        gc.setOutputDir(projectPath + "/src/main/java");
        gc.setAuthor("promefire");
        gc.setOpen(false);
        gc.setSwagger2(true); //实体属性 Swagger2 注解
        gc.setBaseResultMap(true);// XML ResultMap
        gc.setBaseColumnList(true);// XML columList
        //去掉service接口首字母的I, 如DO为User则叫UserService
        gc.setServiceName("%sService");
        mpg.setGlobalConfig(gc);

        // 数据源配置
        DataSourceConfig dsc = new DataSourceConfig();
        // 一、修改数据源
        dsc.setUrl("jdbc:mysql://101.200.228.42:3306/warehouse?useUnicode=true&characterEncoding=utf8&useSSL=false&serverTimezone=GMT%2B8");
        // dsc.setSchemaName("public");
        dsc.setDriverName("com.mysql.jdbc.Driver");
        dsc.setUsername("root");
        dsc.setPassword("zhijie311");
        mpg.setDataSource(dsc);

        // 包配置
        PackageConfig pc = new PackageConfig();
        //pc.setModuleName(scanner("模块名"));
        // 二、模块配置
        pc.setParent("com.warehouse")
                .setEntity("entity")
                .setMapper("mapper")
                .setService("service")
                .setServiceImpl("service.impl")
                .setController("controller");
        mpg.setPackageInfo(pc);

        // 自定义配置
        InjectionConfig cfg = new InjectionConfig() {
            @Override
            public void initMap() {
                // to do nothing
            }
        };

        // 如果模板引擎是 freemarker
        String templatePath = "templates/mapper.xml.ftl";
        // 如果模板引擎是 velocity
        // String templatePath = "/templates/mapper.xml.vm";

        // 自定义输出配置
        List<FileOutConfig> focList = new ArrayList<>();
        // 自定义配置会被优先输出
        focList.add(new FileOutConfig(templatePath) {
            @Override
            public String outputFile(TableInfo tableInfo) {
                // 自定义输出文件名 , 如果你 Entity 设置了前后缀、此处注意 xml 的名称会跟着发生变化!!
                return projectPath + "/src/main/resources/mapper/" + pc.getModuleName()
                        + "/" + tableInfo.getEntityName() + "Mapper" + StringPool.DOT_XML;
            }
        });
        cfg.setFileOutConfigList(focList);
        mpg.setCfg(cfg);

        // 配置模板
        TemplateConfig templateConfig = new TemplateConfig();


        templateConfig.setXml(null);
        mpg.setTemplate(templateConfig);

        // 策略配置
        StrategyConfig strategy = new StrategyConfig();
        strategy.setNaming(NamingStrategy.underline_to_camel);
        strategy.setColumnNaming(NamingStrategy.underline_to_camel);
        strategy.setEntityLombokModel(true);
        strategy.setRestControllerStyle(true);
        strategy.setInclude(scanner("表名,多个英文逗号分割").split(","));
        strategy.setControllerMappingHyphenStyle(true);
        mpg.setStrategy(strategy);
        mpg.setTemplateEngine(new FreemarkerTemplateEngine());
        mpg.execute();
    }
}
前端Vue
前端项目导入到IDEA
直接拷贝进项目目录下
1、在terminal中cd进前端文件夹,npm run serve启动
2、新建运行配置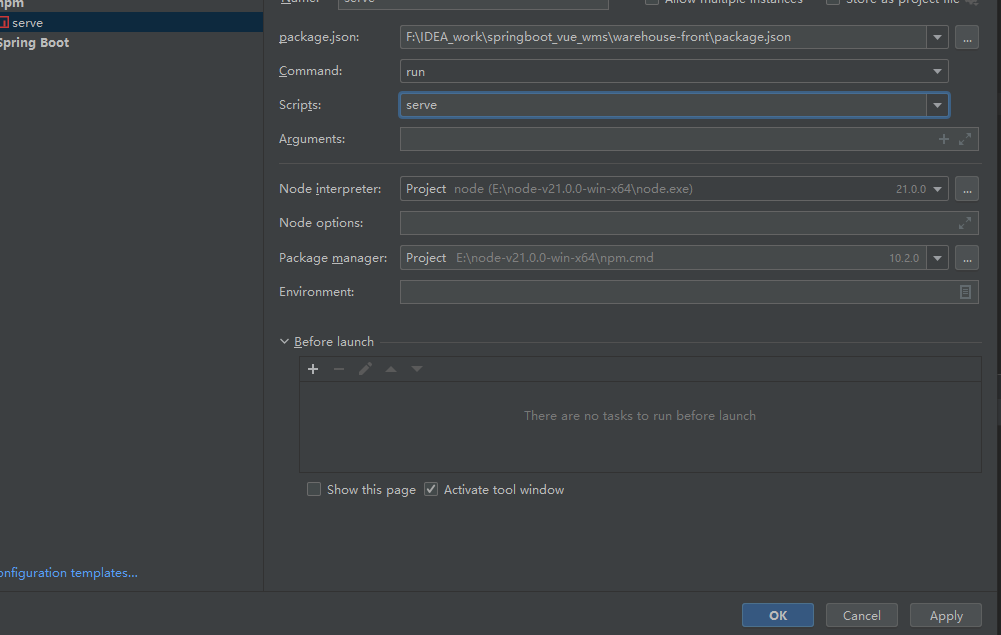
导入Element Plus(适配Vue3)
官网教程https://element-plus.org/zh-CN/guide/
1、安装
npm install element-plus --save2、全局导入
在main.js中加入
import { createApp } from 'vue'
import ElementPlus from 'element-plus'
import 'element-plus/dist/index.css'
import App from './App.vue'

const app = createApp(App)
app.use(ElementPlus)
app.mount('#app')
导入Element UI(适配Vue2)
文档:https://element-plus.org/zh-CN/
npm i element-ui -S在main.js中导入
import Vue from 'vue';
+ import ElementUI from 'element-ui';
+ import 'element-ui/lib/theme-chalk/index.css';
import App from './App.vue';

+ Vue.use(ElementUI);

new Vue({
    el: '#app',
    render: h => h(App)
});
搭建页面布局
使用containter容器
https://element-plus.org/zh-CN/component/container.html#%E4%BE%8B%E5%AD%90
页面布局的拆分
例如将index页拆分成 Header、Main、Aside 。将
<el-header style="text-align: right; font-size: 12px; height: 100%">
        <Header></Header>
</el-header>Header页面编写
1、下拉菜单
2、导航栏伸缩
- 使用图标时要先导入
<el-icon ><Memo /></el-icon>前要导入import {Memo,} from '@element-plus/icons-vue'
菜单导航页面编写
导航页伸缩实现
思路:header点击图标–>提交到父组件—>改变aside组件
涉及到两次通信,第一次: header向父组件通信(子->父)。第二次:父组件向侧边栏组件通信(父->子)
组件间通信
父–>子(props):
父组件
:propIsCollapse="isCollapse"前要加冒号
<template>
    <Aside :propIsCollapse="isCollapse"></Aside>
</template>
子组件
- 要声明父组件传来的数据类型
<script>
export default {
  name: "Aside",
  props:{
    propIsCollapse:Boolean,
  }
}
</script>
子—>父($emit)
子组件 在方法sendMessage函数中emit了一个自定义事件,名为emitCollapse
也可以传递参数this.$emit("emitCollapse",1111)
<script>
export default {
    sendMessage(){
      this.$emit("emitCollapse")
      // this.$emit("emitCollapse",1111)
    }
  },
</script>父组件@emitCollapse表示事件名,与上面子组件emit的事件名称一致,doCollapse表示接收到子组件信息时运行这个函数,
<script>
export default {
  name: "index",
  components: {Main, Header, Aside},
  methods:{
    doCollapse(data){
      console.log(data)
      // 将子组件传递的参数输出到控制台
    }
  }
}
</script>

<template>
  <Header @emitCollapse="doCollapse" ></Header>
</template>
Axios网络请求
文档地址:https://www.axios-http.cn/docs/intro
在前端项目main.js文件中加入
import axios from 'axios'
Vue.prototype.$axios = axios
后端
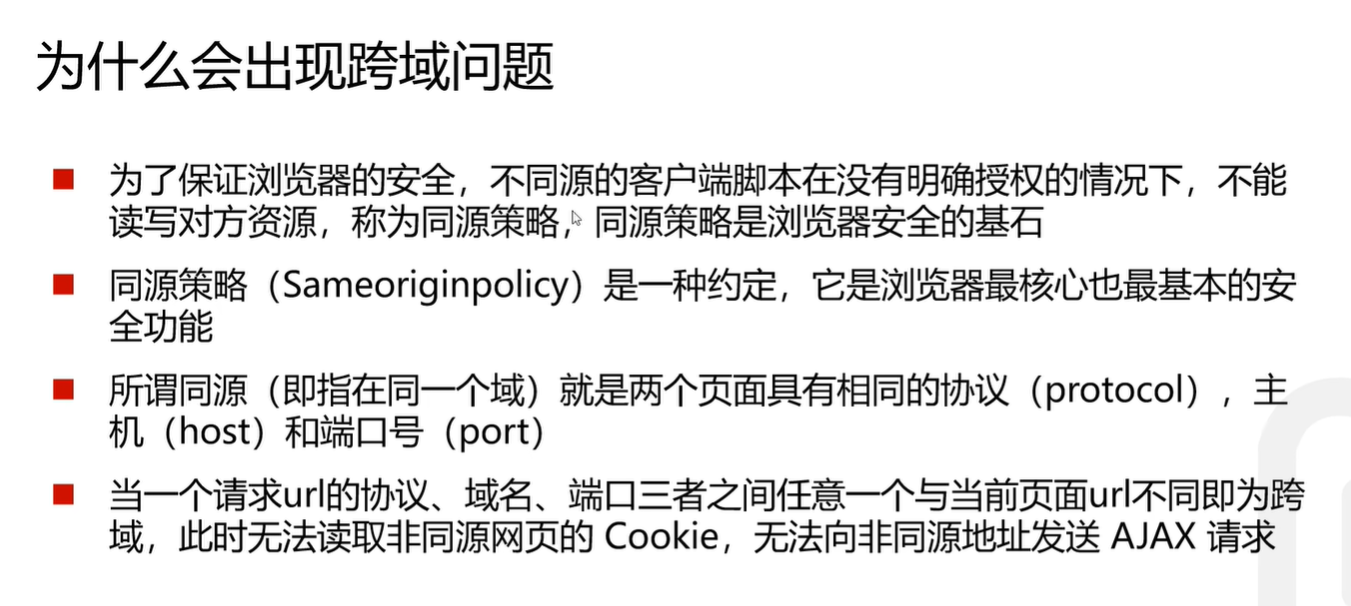
1、全局
在后端项目新增配置类
@Configuration
public class CorsConfig implements WebMvcConfigurer {
    @Override
    public void addCorsMappings(CorsRegistry registry) {
        registry.addMapping("/**") //允许跨域访问的路径
                //是否发送Cookie
                .allowCredentials(true)
                //允许跨域访问的源
                .allowedOriginPatterns("*")
                .allowedMethods(new String[]{"GET", "POST", "PUT", "DELETE"}) //允许请求方法
                .allowedHeaders("*") //允许头部设置
                .exposedHeaders("*");
    }
}
2、单独Controller
单独一个控制器可以通过加``@CrossOrigin `注解实现,该controller下所有方法都可以跨域
在组件创建时运行获取后端数据,赋值给变量tableData
created:function () {
    this.$axios.get("http://localhost:8090//user/findAll").then(response=>{
      this.tableData = response.data
      console.log(response.data)
    })
  }
在main.js中配置
axios.defaults.baseURL = "http://localhost:8090"后,可简写成this.$axios.get("user/findAll")
将tableData数据显示在表格中,需要创建初始的id、no等字段
 <el-table :data="tableData"
  :header-cell-style="{background: '#d9d8d8',color: '#000000'}"
  >
    <el-table-column prop="id" label="日期" width="140">
    </el-table-column>
    <el-table-column prop="no" label="账号" width="120">
    </el-table-column>
    <el-table-column prop="name" label="姓名" width="120">
    </el-table-column>
</el-table>
其中id、no、name要与实体类中的变量名称对应
vue Router路由-组件切换
安装
npm install vue-router@3@3表示安装版本
三个组件Friends.vue、My.vue Discover.vue
Friends.vue
<template>
 <div>
   <h1>关注</h1>
 </div>
</template>
My.vue
<template>
<div>
  <h1>我的音乐</h1>
</div>
</template>
Discover.vue
<template>
<div>
  <h1>发现音乐</h1>
</div>
</template>
在App.vue中
<template>
  <div id="app">
  <router-link to="/discover">发现音乐</router-link>
  <router-link to="/my">我的</router-link>
  <router-link to="/friends">关注</router-link>
<!--占位符  -->
  <router-view></router-view>
  </div>
</template>

<script>


import My from "@/components/My.vue";
import Discover from "@/components/Discover.vue";
import Friends from "@/components/Friends.vue";

export default {
  name: 'App',
  components: {
    My,
    Discover,
    Friends,

  }
}
</script>
此时只有链接,还需要配置路径和组件之间的对应关系
- 注意占位符
<router-view></router-view>不能丢 router.push(...)等同于<router-link : to="...">
新建文件夹router,存放 路由–组件映射文件。新建index.js
import VueRouter from "vue-router";
import Vue  from "vue";

import My from '../components/My.vue'
import Friends from "@/components/Friends.vue";
import Discover from "@/components/Discover.vue";
Vue.use(VueRouter)

const  router = new VueRouter({
    routes: [
        // 指定hash属性与组件之间的对应关系
        {path: '/discover', component: Discover},
        {path: '/friends', component: Friends},
        {path: '/my', component: My},
      // 重定向
      // 将首页重定向到discover页
        {path:'', redirect:'/discover'},

    ]
})

export default router
需要修改的只有
routes中路径与组件的对应关系
之后在main.js中引入
import Vue from 'vue';
import ElementUI from 'element-ui';
import 'element-ui/lib/theme-chalk/index.css';
import axios from 'axios'
axios.defaults.baseURL = "http://localhost:8090"
Vue.prototype.$axios = axios

+ import router from "./router/index";

import App from './App.vue';

Vue.use(ElementUI);

new Vue({
    el: '#app',
+     router:router,
    render: h => h(App)
});
子路由
1、直接按之前的格式写,path路径写二级路径
const  router = new VueRouter({
    routes: [
        // 指定hash属性与组件之间的对应关系
        {path: '/discover', component: Discover},
          .
          .
          .
+        {path:'/discover/today',component: today}

    ]
})
2、使用chidren属性
{path: '/discover', component: Discover,
        children:[
            {path:'today',component:today},
        ]
},
动态路由
文档:https://v3.router.vuejs.org/zh/guide/
每一个商品都有一个详情页,不可能为每一个详情页写一个组件,这时就需要动态路由
将多个链接跳转到一个组件,使用:id
const  router = new VueRouter({
    routes: [
        // 指定hash属性与组件之间的对应关系

        {path: '/my', component: My,
        children:[
            {path: ':id',component: Product}
        ]
        },

    ]
})
导航守卫
https://v3.router.vuejs.org/zh/guide/advanced/navigation-guards.html
router.beforeEach((to, from, next) => {
  if (to.name !== 'Login' && !isAuthenticated) next({ name: 'Login' })
  else next()
})- to: Route: 即将要进入的目标 路由对象
- from: Route: 当前导航正要离开的路由
- 守卫方法中如果声明了next形参,则必须调用next()函数,否则不允许用户访问任何一个路由
VUEX状态管理
文档:https://v3.vuex.vuejs.org/zh/
相当于把所用的值放在一起,谁用谁取,省去了组件之间的繁琐通信
安装:
npm install vuex@3创建一个state在 /store/indes.js
import vue from 'vue'
import Vuex from 'vuex'

vue.use(Vuex)

export default new Vuex.Store({
    state:{
        menu:[]
    },
    mutations:{
        setMenu(state,menu){
            state.menu = menu
        },
        getMenu(state){
            return state.menu
        }

    }
})
在main.js中导入
+ import store from './store'


new Vue({
    el: '#app',
    router:router,
+     store,
    render: h => h(App)
});
通过 store.state 来获取状态对象,以及通过 store.commit("xxx") 方法触发状态变更:
this.$store.commit("setMenu",res.data.menu)动态显示菜单和添加路由
登录时根据用户权限类型取出用户可以访问的菜单,存到store中,侧边栏Aside读取store中menu显示菜单。同时根据menu将路由跳转信息动态添加到router中,
组件Aside中取store中的菜单数据,使用computed
在 Vue.js 中,computed 属性用于计算属性的值,其值根据其他属性的值动态计算得出。在你的示例中,computed 属性 “menu” 用于从 Vuex 的状态中获取菜单数据
使用 computed 的主要优势在于:
- 响应式更新:computed 属性的值会根据其依赖的状态的变化而动态更新。当依赖的状态发生变化时,computed 属性会自动重新计算其值,并在视图中进行更新。
- 缓存:computed 属性的值会被缓存,只有在其依赖的状态发生变化时才会重新计算。这样可以提高性能,避免不必要的计算。
- 简洁性:computed 属性能够简化模板中的逻辑,使代码更加清晰和易读。通过在模板中直接使用 computed 属性,可以减少重复的计算和逻辑。
computed:{
  "menu":{
    get(){
      return this.$store.state.menu
    }
  }
},
根据menu显示菜单
<el-menu-item :index="'/' + item.menuclick "  v-for="(item,i) in menu" :key="i">
      <i :class="item.menuicon"></i>
      <span slot="title" >{{ item.menuname }}</span>
    </el-menu-item>
根据menu信息添加路由
在/store/index.js中新建一个方法addNewRouter,在setMenu中调用。登录时保存菜单信息的同时添加路由
function addNewRouter(menulist){
    let routes = router.options.routes
    console.log(routes)

    routes.forEach(routerItem=>{
        if(routerItem.path == '/Index'){
            menulist.forEach(menuitem=>{
                let childRoute = {
                    path:"/" + menuitem.menuclick,
                    // component: menuitem.menucomponent,
                    name: menuitem.menuname,
                    meta:{
                        title: menuitem.menuname
                    },
                    component:()=>import('../components/' + menuitem.menucomponent)
                }

                routerItem.children.push(childRoute)
            })

        }

    })
    router.addRoutes(routes)
}s
登录页面
sessionStorage 用于临时保存同一窗口(或标签页)的数据,在关闭窗口或标签页之后将会删除这些数据。存储的是 key/value
保存数据
sessionStorage.setItem("CurUser",JSON.stringify(res.data.user))获取数据
sessionStorage.getItem("CurUser")- 获取到的数据是字符串格式,要使用
JSON.parse("xxx")转换为json格式
问题
报错:NavigationDuplicated: Avoided redundant navigation to current location: “/Home”
这个警告通常在Vue Router中出现,它表示尝试导航到当前位置的冗余导航。这可能是因为你正在尝试导航到一个路由,而该路由已经是当前活动的路由。
解决:https://stackoverflow.com/questions/62462276/how-to-solve-avoided-redundant-navigation-to-current-location-error-in-vue
this.$router.push("/Home").catch(()=>{});避免错误显示,让浏览器以为错误被处理了。
Vue启动项目卡在24%
解决:https://blog.csdn.net/m0_60967241/article/details/124308389
原因是某个vue组件中<template></template> 出现了未用<div> 包装起来的东西
菜单跳转
- 主要要加router!!!!!!!!!!!!!!!!!!!!!!!
<el-menu
      default-active="/Home"
      background-color="#545c64"
      text-color="#fff"
      active-text-color="#ffd04b"
      :collapse="propIsCollapse"
      :collapse-transition="false"
      style="height: 100vh"
+      router
        >
    <el-menu-item index="/Home">
      <i class="el-icon-s-home"></i>
      <span slot="title" >主页</span>
    </el-menu-item>
    <el-menu-item index="/User">
      <i class="el-icon-s-home"></i>
      <span slot="title" >导航一</span>
    </el-menu-item>
    <el-menu-item index="/Record">
      <i class="el-icon-s-home"></i>
      <span slot="title" >导航一</span>
    </el-menu-item>


  </el-menu>
Form表单重置
表单重置:https://www.cnblogs.com/ggsddu/p/12297980.html
表格中选中的物品某一栏,点击入库,自动填充物品名不变化,去掉prop="name"
<el-form-item label="物品名"
-         prop="name"
  >
          <el-col :span="20">
            <el-input v-model="form1.name"></el-input>
          </el-col>
        </el-form-item>
部署
服务器:centos
前端:Vue
后端:Spring boot
数据库:Mysql
JDK8 linux安装
https://repo.huaweicloud.com/java/jdk/8u151-b12/
前端项目部署
1、cd进前端项目目录,执行npm run build打包,运行后会生成dist文件夹,打包上传到服务器
2、服务器端
查看nginx配置文件路径
nginx -t修改配置文件,新增一个server如下
.
.
.


server
    {
        listen 888;
        server_name phpmyadmin;
        index index.html index.htm index.php;
        root  /www/server/phpmyadmin;

        #error_page   404   /404.html;
        include enable-php.conf;

        location ~ .*\.(gif|jpg|jpeg|png|bmp|swf)$
        {
            expires      30d;
        }

        location ~ .*\.(js|css)?$
        {
            expires      12h;
        }

        location ~ /\.
        {
            deny all;
        }

        access_log  /www/wwwlogs/access.log;
    }
+server {
+    listen 8091;
+    server_name 101.200.228.42;  # 替换为你的域名或 IP 地址
+
+    root /usr/server/Vue/dist/;
+    index index.html;

+    location / {
+        try_files $uri $uri/ /index.html;
+    }
+}
后端项目部署
0:安装maven环境
下载地址:https://maven.apache.org/download.cgi
1、项目打包(jar包)
mvn packagejar包自带tomcat服务器,打包成war包的话需要自己配置服务器
2、后台运行jar包
上传到服务器后指定端口运行
java -jar -Dserver.port=8090 warehouse.jar使用screen -U后台运行
- 如果之前用的本地数据库要修改为服务器数据库
- vue项目中从后端取数据的路径要修改为服务器ip或域名
- 端口安全组、防火墙放行