hexo恢复及使用hexon实现在线编辑同步
前言
hexo是一个轻量级的博客主题框架,挂载GitHub上不用太操心,但是有一点不方便的是hexo没有后台,每次发博都要本地写好然后hexo三件套,最近发现了一个hexon的GUI,可以实现hexo的在线编辑部署。ps-需要一台服务器
博客恢复
安装npm、hexo、pnpm、git
- npm
在这里 下载npm,可以离线下载,也可以使用wget下载
解压tar -zxvf node-v10.24.1-linux-x64.tar.gz
将npm写入环境变量文件
①vi /etc/profile
②在末尾添加 export PATH="/root/node-v17.3.0-linux-x64/bin"
③source /etc/profile 激活
- hexo
使用npm安装npm install -g hexo-cli
- pnpm
npm install pnpm -g 注意要加-g表示全局
- git
centos 下yum install git
github添加密钥
git config --global user.name "xxxxxxx"
git config --global user.email "[email protected]"
ssh-keygen -t rsa -C "[email protected]"完成后会在提示的路径下生成两个文件id_rsa和id_rsa.pub前者是私钥,后者公钥,
查看公钥内容
cat /root/.ssh/id_rsa.pub复制内容,在github中点击右上角头像,依次打开"Setting"–“SSH and GPG keys”–“New SSH Key” 粘贴
拷贝源码
git clone https://github.com/XXXXX/hexo_source.git
npm install #还原项目依赖
测试
确保基本的操作可以成功
hexo clean
hexo generate
hexo deploy
部署hexon
拉取hexon项目并还原依赖, 初始化博客配置
git clone https://github.com/gethexon/hexon
pnpm install
pnpm run setup
启动hexon
pnpm start注意:第一次启动时需要指定启动端口,这里需要注意事先在阿里云安全组/腾讯云防火墙打开端口
本地访问云服务器上打开的 localhost:4000
众所周知,除非用的云服务器是带界面的,否则ctrl + 点击 打开的是本地的4000端口。这里我们用用本地电脑连接上服务器,从而把本地的localhost作为服务器的localhost来使用
,在本地输入命令
ssh -L 4000:127.0.0.1:4000 [email protected]其中4000是hexon端口,username指登录云服务器用户名,xx.xx.xx.xx指公网ip
完成后,即可在本地浏览器输入localhost:4000访问服务器的4000端口,如图所示: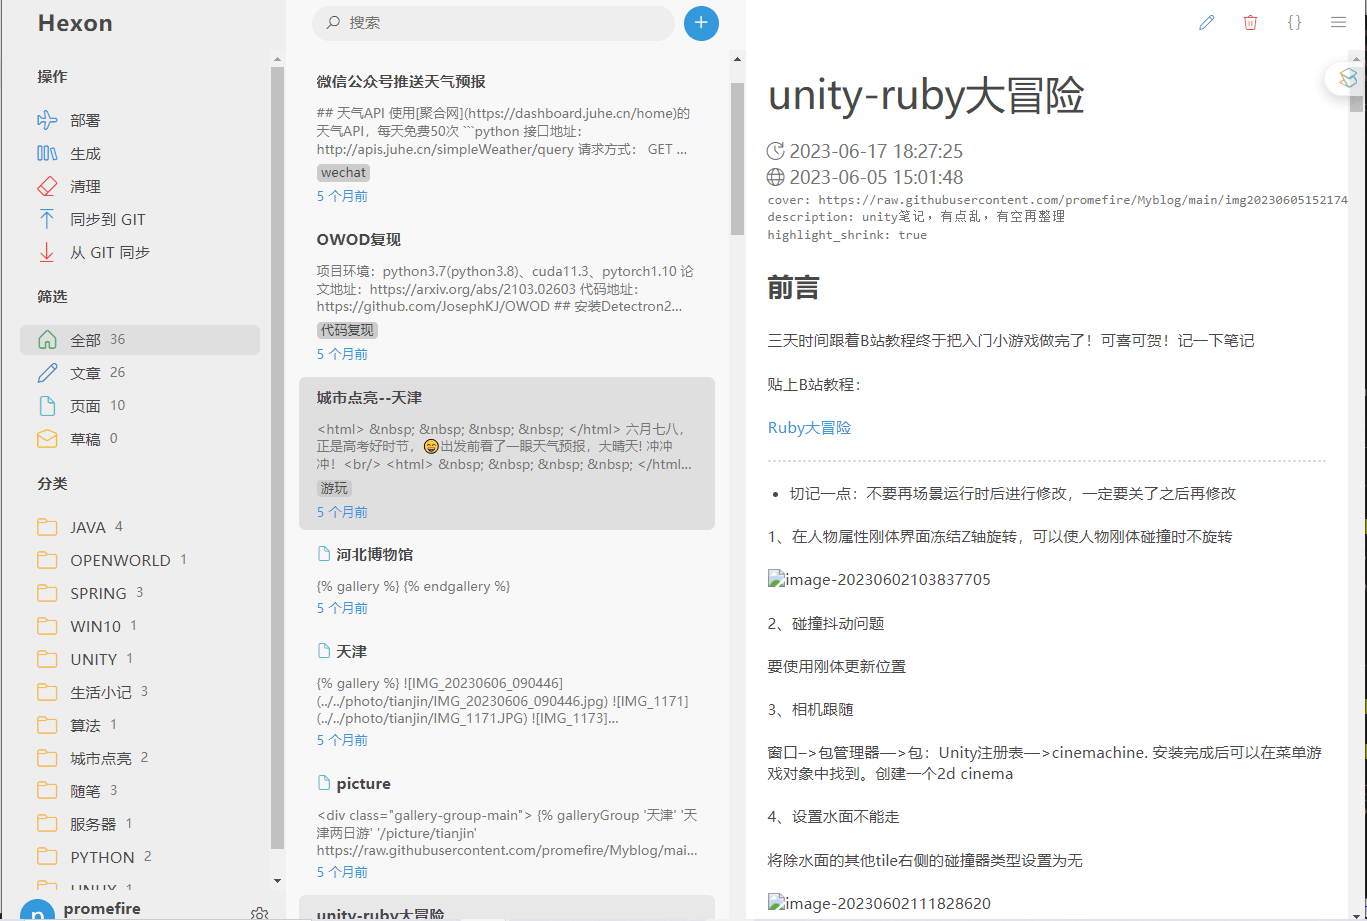
ps:使用相对路径的图片在这里打不开,不过也没有关系,先用github图床,有空用服务器作图床,github做备份
Systemd守护进程
上面完成后服务器端的hexon服务需要手动启动,且shell断开后结束,使用systemd加入守护进程
新增服务
在/etc/systemd/system/下创建一个文件命名为hexon.service表示新增一个名为hexon的进程hexon.service内容如下:
[Unit]
Description=Hexon Service
After=network.target

[Service]
Environment=PATH=/root/node-v17.3.0-linux-x64/bin/pnpm:/usr/local/sbin:/usr/local/bin:/usr/sbin:/usr/bin
WorkingDirectory=/root/hexon-master/server
Type=simple
User=root
Group=root
Restart=on-failure
RestartSec=5s
ExecStart=/root/node-v17.3.0-linux-x64/bin/pnpm cross-env NODE_ENV=production node /root/hexon-master/server/dist/index.js
LimitNOFILE=1048576

[Install]
WantedBy=multi-user.targetEnvironment=PATH=代表环境变量WorkingDirectory代表工作目录ExecStart=指定服务启动时执行的命令
我们可以找一下上面使用pnpm start启动hexon的入口文件写在这里。查看package.json文件中start一行,如下:
{
  "private": true,
  "scripts": {
    "setup": "node ./bin/index.js install",
    "resetpwd": "node ./bin/index.js resetpwd",
    "script": "node ./bin/index.js script",
    "start": "cross-env DEBUG=null NODE_ENV=production && node dist/index.js",
    "prd": "pm2 start dist/index.js --name hexon -o log/pm2-log.log -e log/pm2-err.log",
    "dev": "pnpm run build && nodemon ./dist/index.js",
    "build": "rimraf dist && node ./scripts/build.mjs",
    "test": "jest"
  },
  .......
启动服务
systemctl enable hexon     # 添加自启
systemctl start hexon      # 启动服务
如果修改配置文件重新启动
systemctl daemon-reload
systemctl restart hexon
查看服务状态
systemctl status hexon查看服务日志
sudo journalctl -u hexon -f原本想着每次都要输入端口用户名ip太麻烦了,想改成直接公网ip访问,监听代码如下,但没有成功,再一想,也确实不能把这个相当于管理后台的界面暴露在公网,要ip访问也得是内网ip访问,有空再说。
server.on("listening", () => {
  const addr = server.address();
  //const bind = typeof addr === "string" ? "pipe " + addr : "http://localhost:" + addr.port;
  const bind = typeof addr === "string" ? "pipe " + addr : "http://124.221.201.197:" + addr.port;
  console.log("Server running on " + bind);
  const his = import_tsyringe19.container.resolve(HexoInstanceService);
  his.init().catch(console.error);
});
总结
hexon只是提供了一个界面,这就是为什么要先确保博客部署流程正确,作为一个伪后台,还是有些不足:
1、在博客的编辑页面是纯纯源代码格式,需要加一个可选择的markdown分屏预览效果
2、缺少博客备份的选项,毕竟服务器只租一年,还是github备份不易丢失。这个人家已经实现了,即“同步到git”选项,在服务器上测试好git push成功就能用了。